Using the Web Speech API
{{DefaultAPISidebar("Web Speech API")}}
The Web Speech API provides two distinct areas of functionality — speech recognition and speech synthesis (also known as text to speech, or TTS) — which open up interesting possibilities for accessibility and control. This article provides an introduction to both the areas, along with demos.
Speech recognition
Speech recognition involves receiving audio from a device’s microphone (or from an audio track), which is then checked by a speech recognition service. When the service successfully recognizes a word or phrase, it returns a text string (or a list of strings) that you can use to initiate further actions.
The Web Speech API has a main controller interface for this — {{domxref("SpeechRecognition")}} — and several related interfaces for representing results.
Generally, the speech recognition system available on the user’s device is used for the speech recognition. Most modern operating systems have a speech recognition system for issuing voice commands, such as Dictation on macOS or Copilot on Windows.
By default, using speech recognition on a web page involves a server-based recognition engine. Your audio is sent to a web service for recognition processing, so it won’t work offline.
To improve privacy and performance, you can specify that speech recognition be performed on the device. This ensures that neither the audio nor the transcribed speech are sent to a third-party service for processing. We cover the on-device functionality in more detail in the On-device speech recognition section.
Demo
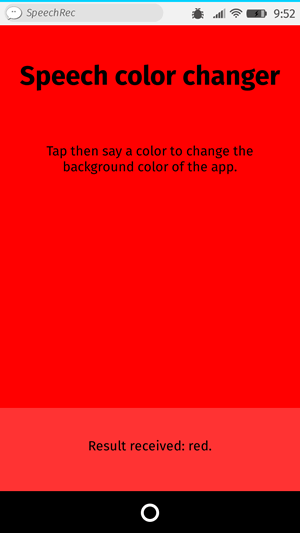
To demonstrate how to use speech recognition, we’ve created a sample app called Speech color changer. After you press the Start recognition button, say an HTML color keyword. The app’s background color will change to that color.
To run the demo, navigate to the live demo URL in a supporting browser.
HTML and CSS
The HTML and CSS for the app are basic. There’s a title, an instruction paragraph ({{htmlelement("p")}} ), a control {{htmlelement("button")}} , and an output paragraph where we display diagnostic messages, including the words that our app recognized.
<h1>Speech color changer</h1>

<p class="hints"></p>

<button>Start recognition</button>

<p class="output"><em>...diagnostic messages</em></p>
The CSS provides a basic responsive styling so that it looks OK across devices.
JavaScript
Let’s look at the JavaScript in a bit more detail.
Prefixed properties
Some browsers currently support speech recognition with prefixed properties. Therefore, at the start of our code, we include these lines to allow for both prefixed properties and unprefixed versions:
const SpeechRecognition =
  window.SpeechRecognition || window.webkitSpeechRecognition;
const SpeechRecognitionEvent =
  window.SpeechRecognitionEvent || window.webkitSpeechRecognitionEvent;
Color list
The next part of our code defines a few sample colors that we print to the UI to give users an idea of what to say:
const colors = [
  "aqua",
  "azure",
  "beige",
  "bisque",
  "black",
  "blue",
  "brown",
  "chocolate",
  "coral",
  // …
];
Creating a speech recognition instance
Next, we define a speech recognition instance to control the recognition in our app. We do this by using the {{domxref("SpeechRecognition.SpeechRecognition()","SpeechRecognition()")}} constructor.
const recognition = new SpeechRecognition();
We then set a few properties of the recognition instance:
{{domxref("SpeechRecognition.continuous")}}: Controls whether results are captured continuously (true) or only once each time a recognition starts (false).{{domxref("SpeechRecognition.lang")}}: Sets the language of the recognition. Setting this explicitly is the recommended best practice.{{domxref("SpeechRecognition.interimResults")}}: Defines whether the speech recognition system should return interim results or only final results. For this demo, final results are good enough.{{domxref("SpeechRecognition.maxAlternatives")}}: Sets the number of alternative potential matches that should be returned per result. This can sometimes be useful, say if a result is not completely clear and you want to display a list of alternatives for the user to choose from. But it’s not needed for this demo, so we’re just specifying one (which is the default anyway).
recognition.continuous = false;
recognition.lang = "en-US";
recognition.interimResults = false;
recognition.maxAlternatives = 1;
Starting the speech recognition
After grabbing references to the output paragraph, the <html> element, the instruction paragraph, and the <button>, we implement an onclick handler. When a user presses the button, the speech recognition service starts by calling {{domxref("SpeechRecognition.start()")}} . We’ve also used a forEach() method to output colored indicators showing what colors users can try to say.
const diagnostic = document.querySelector(".output");
const bg = document.querySelector("html");
const hints = document.querySelector(".hints");
const startBtn = document.querySelector("button");

const colorHTML = colors
  .map((v) => `<span style="background-color:${v};">${v}</span>`)
  .join("");
hints.innerHTML = `Press the button then say a color to change the background color of the app. Try ${colorHTML}.`;

startBtn.onclick = () => {
  recognition.start();
  console.log("Ready to receive a color command.");
};
Receiving and handling results
Once the speech recognition has started, several event handlers become available, which you can use to retrieve results and other related information (see Events for SpeechRecognition). The most common one is the {{domxref("SpeechRecognition.result_event", "result")}} event, which fires after a successful result is received:
recognition.onresult = (event) => {
  const color = event.results[0][0].transcript;
  diagnostic.textContent = `Result received: ${color}.`;
  bg.style.backgroundColor = color;
  console.log(`Confidence: ${event.results[0][0].confidence}`);
};
The second line is a bit complex, so we’ll explain each part here:
- The
{{domxref("SpeechRecognitionEvent.results")}}property returns a{{domxref("SpeechRecognitionResultList")}}object containing{{domxref("SpeechRecognitionResult")}}objects. It has a getter so it can be accessed like an array — the first[0]returns theSpeechRecognitionResultat position0. - Each
SpeechRecognitionResultobject in turn contains{{domxref("SpeechRecognitionAlternative")}}objects, each representing an individual recognized word. These also have getters, so they can be accessed like arrays — the second[0]returns theSpeechRecognitionAlternativeat position0. - The
transcriptproperty of theSpeechRecognitionAlternativereturns a string containing the recognized text. This value is then used to set the background color to a recognized color and also report it as a diagnostic message in the UI.
We also use the {{domxref("SpeechRecognition.speechend_event", "speechend")}} event to stop the speech recognition service (using {{domxref("SpeechRecognition.stop()")}} ) after a single word has been recognized:
recognition.onspeechend = () => {
  recognition.stop();
};
Handling errors and unrecognized speech
The last two handlers cover cases where the spoken term isn’t recognized or an error occurs with the recognition. The {{domxref("SpeechRecognition.nomatch_event", "nomatch")}} event is supposed to handle the first case, although in most cases the recognition engine will return something, even if it is unintelligible:
recognition.onnomatch = (event) => {
  diagnostic.textContent = "I didn't recognize that color.";
};
The {{domxref("SpeechRecognition.error_event", "error")}} event handles cases when there is an actual error with the recognition — the {{domxref("SpeechRecognitionErrorEvent.error")}} property contains the error returned:
recognition.onerror = (event) => {
  diagnostic.textContent = `Error occurred in recognition: ${event.error}`;
};
On-device speech recognition
Speech recognition is usually performed using an online service. This means that an audio recording is sent to a server for processing, and the results are then returned to the browser. This has a couple of problems:
- Privacy: Many users are not comfortable with their speech being sent to a server.
- Performance: Sending data to a server for every bit of recognition can slow down performance in more intensive applications, and your apps won’t work offline.
To mitigate these problems, the Web Speech API lets you specify that speech recognition should be handled on-device by the browser. This requires a one-time language pack download for each language you want to recognize; once installed, the functionality will be available offline.
This section explains how to use on-device speech recognition.
Demo
To demonstrate on-device speech recognition, we’ve created a sample app called On-device speech color changer (run the demo live).
This demo works in a very similar fashion to the online speech color changer demo discussed earlier, with the differences noted below.
Specifying on-device recognition
To specify that you want to use the browser’s on-device processing, set the {{domxref("SpeechRecognition.processLocally")}} property to true before starting any speech recognition (the default value is false):
recognition.processLocally = true;
Checking availability and installing language packs
For on-device speech recognition to work, the browser must have a language pack installed for the language you want to recognize. If you run the start() method after specifying processLocally = true but the correct language pack isn’t installed, the function call will fail with a language-not-supported error.
To get the correct language pack installed, ensure you follow these two steps:
- Check whether the language pack is available on the user’s device: This is handled using the
{{domxref("SpeechRecognition.available_static", "SpeechRecognition.available()")}}static method. - Install the language pack if it isn’t available: This is handled using the
{{domxref("SpeechRecognition.install_static", "SpeechRecognition.install()")}}static method.
These steps are handled in the following click event handler on the app’s control <button>:
startBtn.addEventListener("click", () => {
  // check availability of target language
  SpeechRecognition.available({ langs: ["en-US"], processLocally: true }).then(
    (result) => {
      if (result === "unavailable") {
        diagnostic.textContent = `en-US is not available to download at this time. Sorry!`;
      } else if (result === "available") {
        recognition.start();
        console.log("Ready to receive a color command.");
      } else {
        diagnostic.textContent = `en-US language pack is downloading...`;
        SpeechRecognition.install({
          langs: ["en-US"],
          processLocally: true,
        }).then((result) => {
          if (result) {
            diagnostic.textContent = `en-US language pack downloaded. Start recognition again.`;
          } else {
            diagnostic.textContent = `en-US language pack failed to download. Try again later.`;
          }
        });
      }
    },
  );
});
The available() method takes an options object containing two properties:
- A
langsarray containing the languages to check availability for. - A
processLocallyboolean specifying whether to check for the availability of the language only on-device (true) or either locally or via a server-based recognition service (false, the default).
When run, this method returns a {{jsxref("Promise")}} that resolves with an enumerated value indicating the availability of the specified languages. In our demo, we test for three conditions:
- If the resulting value is
unavailable, it means that no suitable language pack is available to download. We also print an appropriate message to the output. - If the resulting value is
available, it means that the language pack is available locally, so recognition can begin. In this case, we runstart()and log a message to the console when the app is ready to receive speech. - If the value is something else (
downloadableordownloading), we print a diagnostic message to inform the user that a language pack download is starting, then run theinstall()method to handle the download.
The install() method works in a similar way to the available() method, except that its options object only takes the langs array. When run, it starts downloading all the language packs for the languages indicated in langs and returns a {{jsxref("Promise")}} that resolves with a boolean indicating whether the specified language packs were downloaded and installed successfully (true) or not (false).
For this demo, we print a diagnostic message to indicate the success and failure cases. In a more complete app, you’d probably disable the controls during the download process and enable them again after the promise resolves.
Permissions-policy integration
The use of the available() and install() methods is controlled by the {{httpheader("Permissions-Policy/on-device-speech-recognition", "on-device-speech-recognition")}} {{httpheader("Permissions-Policy")}} . Specifically, where a defined policy blocks usage, any attempts to call these methods will fail.
The default allowlist value for on-device-speech-recognition is self. This means you don’t need to worry about adjusting the policy unless you’re attempting to use these methods in embedded cross-origin documents or want to explicitly disable their use.
Unprefixed Web Speech API
In the original speech color changer demo, we included extra lines to handle browsers that support the Web Speech API only with vendor-prefixed properties (see the Prefixed properties section for more details).
In the on-device version of the demo, prefix-handling code is not needed because the implementations that support this functionality do so without prefixes.
Contextual biasing in speech recognition
There will be times when a speech recognition service will fail to correctly recognize a specific word or phrase. This most often happens with domain-specific terms (such as medical or scientific vocabulary), proper nouns, uncommon phrases, or words that sound similar to other words and so may be misidentified.
For example, during testing, we found that our On-device speech color changer had trouble recognizing the color azure — it kept returning results like “as you”. Other colors that were frequently misidentified included khaki (“car key”), tan, and thistle (“this all”).
To mitigate such problems, the Web Speech API lets you provide hints to the recognition engine to highlight phrases that are more likely to be spoken and which the engine should be biased towards. This makes those words and phrases more likely to be recognized correctly.
You can do this by setting an array of {{domxref("SpeechRecognitionPhrase")}} objects as the value of the {{domxref("SpeechRecognition.phrases")}} property. Each SpeechRecognitionPhrase object contains:
- A
phraseproperty, which is a string containing the word or phrase you want to boost. - A
boostproperty, which is a floating point number between0.0and10.0(inclusive) that sets the amount of boost you want to apply to that word or phrase. Higher values make the word or phrase more likely to be recognized.
In our “On-device speech color changer” demo, we handle this by creating an array of phrases to boost and their boost values:
const phraseData = [
  { phrase: "azure", boost: 5.0 },
  { phrase: "khaki", boost: 3.0 },
  { phrase: "tan", boost: 2.0 },
];
These need to be represented as an ObservableArray of SpeechRecognitionPhrase objects. We handle this by mapping the original array to convert each array element into a SpeechRecognitionPhrase object using the {{domxref("SpeechRecognitionPhrase.SpeechRecognitionPhrase", "SpeechRecognitionPhrase()")}} constructor:
const phraseObjects = phraseData.map(
  (p) => new SpeechRecognitionPhrase(p.phrase, p.boost),
);
After creating the SpeechRecognition instance, we add our contextual biasing phrases by setting the phraseObjects array as the value of the SpeechRecognition.phrases property:
recognition.phrases = phraseObjects;
The phrases array can be modified just like a normal JavaScript array, for example by pushing new phrases to it dynamically:
recognition.phrases.push(new SpeechRecognitionPhrase("thistle", 5.0));
With this code, we found that the problematic color keywords were recognized more accurately than before.
Speech synthesis
Speech synthesis (aka text-to-speech, or TTS) involves receiving synthesizing text contained within an app to speech, and playing it out of a device’s speaker or audio output connection.
The Web Speech API has a main controller interface for this — {{domxref("SpeechSynthesis")}} — plus a number of closely-related interfaces for representing text to be synthesized (known as utterances), voices to be used for the utterance, etc. Again, most OSes have some kind of speech synthesis system, which will be used by the API for this task as available.
Demo
To demonstrate how to use web speech synthesis, we’ve created a sample app called Speech synthesizer. It has an input field for entering the text to be synthesized. You can adjust the rate and pitch and also select a voice from the dropdown menu to use for the spoken text. After you’ve entered your text, press Enter/Return or click the Play button to hear the text read aloud.

To run the demo, navigate to the live demo URL in a supporting browser.
HTML and CSS
The HTML and CSS for this app are pretty basic. There’s a title, some instructions for use, and a form with some basic controls. The {{htmlelement("select")}} element is initially empty; it is populated with {{htmlelement("option")}} s via JavaScript (covered later).
<h1>Speech synthesizer</h1>

<p>
  Enter some text in the input below and press return to hear it. Change voices
  using the dropdown menu.
</p>

<form>
  <input type="text" class="txt" />
  <div>
    <label for="rate">Rate</label
    ><input type="range" min="0.5" max="2" value="1" step="0.1" id="rate" />
    <div class="rate-value">1</div>
    <div class="clearfix"></div>
  </div>
  <div>
    <label for="pitch">Pitch</label
    ><input type="range" min="0" max="2" value="1" step="0.1" id="pitch" />
    <div class="pitch-value">1</div>
    <div class="clearfix"></div>
  </div>
  <select></select>
</form>
JavaScript
Let’s investigate the JavaScript that powers this app.
Setting variables
First of all, we capture references to all the DOM elements involved in the UI, but more interestingly, we capture a reference to {{domxref("Window.speechSynthesis")}} . This is API’s entry point — it returns an instance of {{domxref("SpeechSynthesis")}} , the controller interface for web speech synthesis.
const synth = window.speechSynthesis;

const inputForm = document.querySelector("form");
const inputTxt = document.querySelector(".txt");
const voiceSelect = document.querySelector("select");

const pitch = document.querySelector("#pitch");
const pitchValue = document.querySelector(".pitch-value");
const rate = document.querySelector("#rate");
const rateValue = document.querySelector(".rate-value");

const voices = [];
Populating the select element
To populate the {{htmlelement("select")}} element with the different voice options the device has available, we’ve written a populateVoiceList() function. We first invoke {{domxref("SpeechSynthesis.getVoices()")}} , which returns a list of all the available voices, represented by {{domxref("SpeechSynthesisVoice")}} objects. We then loop through this list — for each voice we create an {{htmlelement("option")}} element, set its text content to display the name of the voice (grabbed from {{domxref("SpeechSynthesisVoice.name")}} ), the language of the voice (grabbed from {{domxref("SpeechSynthesisVoice.lang")}} ), and -- DEFAULT if the voice is the default voice for the synthesis engine (checked by seeing if {{domxref("SpeechSynthesisVoice.default")}} returns true.)
We also create data- attributes for each option, containing the name and language of the associated voice, so we can grab them easily later on, and then append the options as children of the select.
function populateVoiceList() {
  voices = synth.getVoices();

  for (const voice of voices) {
    const option = document.createElement("option");
    option.textContent = `${voice.name} (${voice.lang})`;

    if (voice.default) {
      option.textContent += " — DEFAULT";
    }

    option.setAttribute("data-lang", voice.lang);
    option.setAttribute("data-name", voice.name);
    voiceSelect.appendChild(option);
  }
}
Older browser don’t support the {{domxref("SpeechSynthesis.voiceschanged_event", "voiceschanged")}} event, and just return a list of voices when {{domxref("SpeechSynthesis.getVoices()")}} is fired.
While on others, such as Chrome, you have to wait for the event to fire before populating the list.
To allow for both cases, we run the function as shown below:
populateVoiceList();
if (speechSynthesis.onvoiceschanged !== undefined) {
  speechSynthesis.onvoiceschanged = populateVoiceList;
}
Speaking the entered text
Next, we create an event handler to start speaking the text entered into the text field. We are using an onsubmit handler on the form so that the action happens when Enter/Return is pressed. We first create a new {{domxref("SpeechSynthesisUtterance.SpeechSynthesisUtterance()", "SpeechSynthesisUtterance()")}} instance using its constructor — this is passed the text input’s value as a parameter.
Next, we need to figure out which voice to use. We use the {{domxref("HTMLSelectElement")}} selectedOptions property to return the currently selected {{htmlelement("option")}} element. We then use this element’s data-name attribute, finding the {{domxref("SpeechSynthesisVoice")}} object whose name matches this attribute’s value. We set the matching voice object to be the value of the {{domxref("SpeechSynthesisUtterance.voice")}} property.
Finally, we set the {{domxref("SpeechSynthesisUtterance.pitch")}} and {{domxref("SpeechSynthesisUtterance.rate")}} to the values of the relevant range form elements. Then, with all necessary preparations made, we start the utterance being spoken by invoking {{domxref("SpeechSynthesis.speak()")}} , passing it the {{domxref("SpeechSynthesisUtterance")}} instance as a parameter.
inputForm.onsubmit = (event) => {
  event.preventDefault();

  const utterThis = new SpeechSynthesisUtterance(inputTxt.value);
  const selectedOption =
    voiceSelect.selectedOptions[0].getAttribute("data-name");
  for (const voice of voices) {
    if (voice.name === selectedOption) {
      utterThis.voice = voice;
    }
  }
  utterThis.pitch = pitch.value;
  utterThis.rate = rate.value;
  synth.speak(utterThis);
  utterThis.onpause = (event) => {
    const char = event.utterance.text.charAt(event.charIndex);
    console.log(
      `Speech paused at character ${event.charIndex} of "${event.utterance.text}", which is "${char}".`,
    );
  };
  inputTxt.blur();
};
In the final part of the handler, we include a {{domxref("SpeechSynthesisUtterance.pause_event", "pause")}} event to demonstrate how {{domxref("SpeechSynthesisEvent")}} can be put to good use. When {{domxref("SpeechSynthesis.pause()")}} is invoked, this returns a message reporting the character number and name that the speech was paused at.
Finally, we call blur() on the text input. This is mainly to hide the keyboard on Firefox OS.
Updating the displayed pitch and rate values
The last part of the code updates the pitch/rate values displayed in the UI, each time the slider positions are moved.
pitch.onchange = () => {
  pitchValue.textContent = pitch.value;
};

rate.onchange = () => {
  rateValue.textContent = rate.value;
};